Customize Design
Using your own site photo
Customize Design can apply Balentino surfaces to a photograph of your own space. Follow the steps below for an accurate preview.
 01
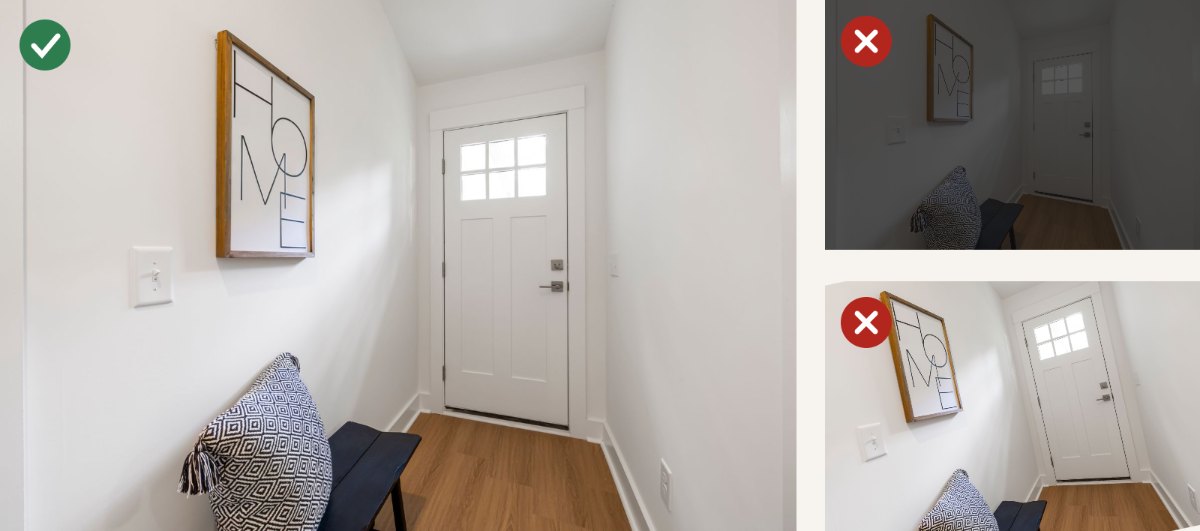
01Take a suitable photo
Stand facing the surface and photograph it in landscape orientation. Use even lighting, avoid strong reflections and, where possible, remove loose items from in front of the surface. Include all four corners of the surface if you can.
 02
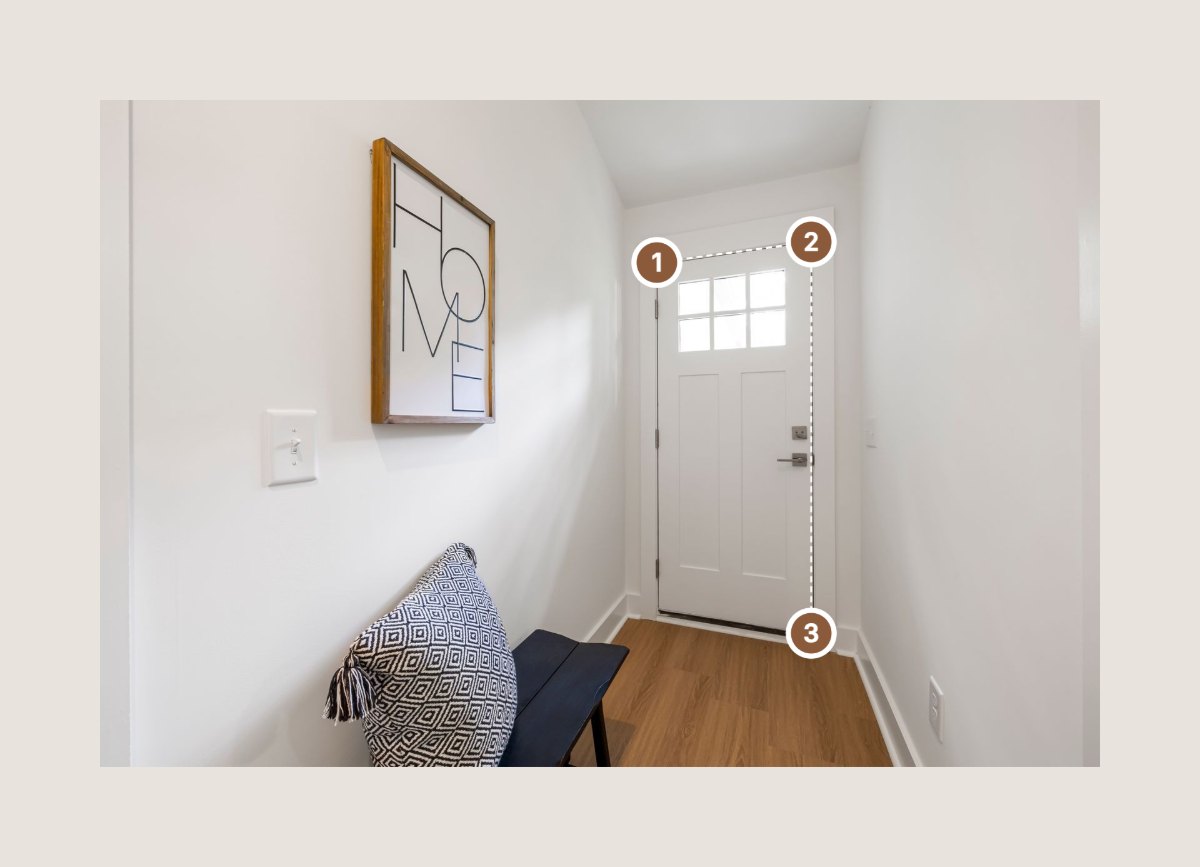
02Upload and mark the surface
Select “Upload your site photo” and choose the photo. Then tap the four corners of the wall, door or cabinet front, in any order. A corner hidden behind furniture or outside the photo may be placed at its approximate position, including beyond the edge of the photo.
 03
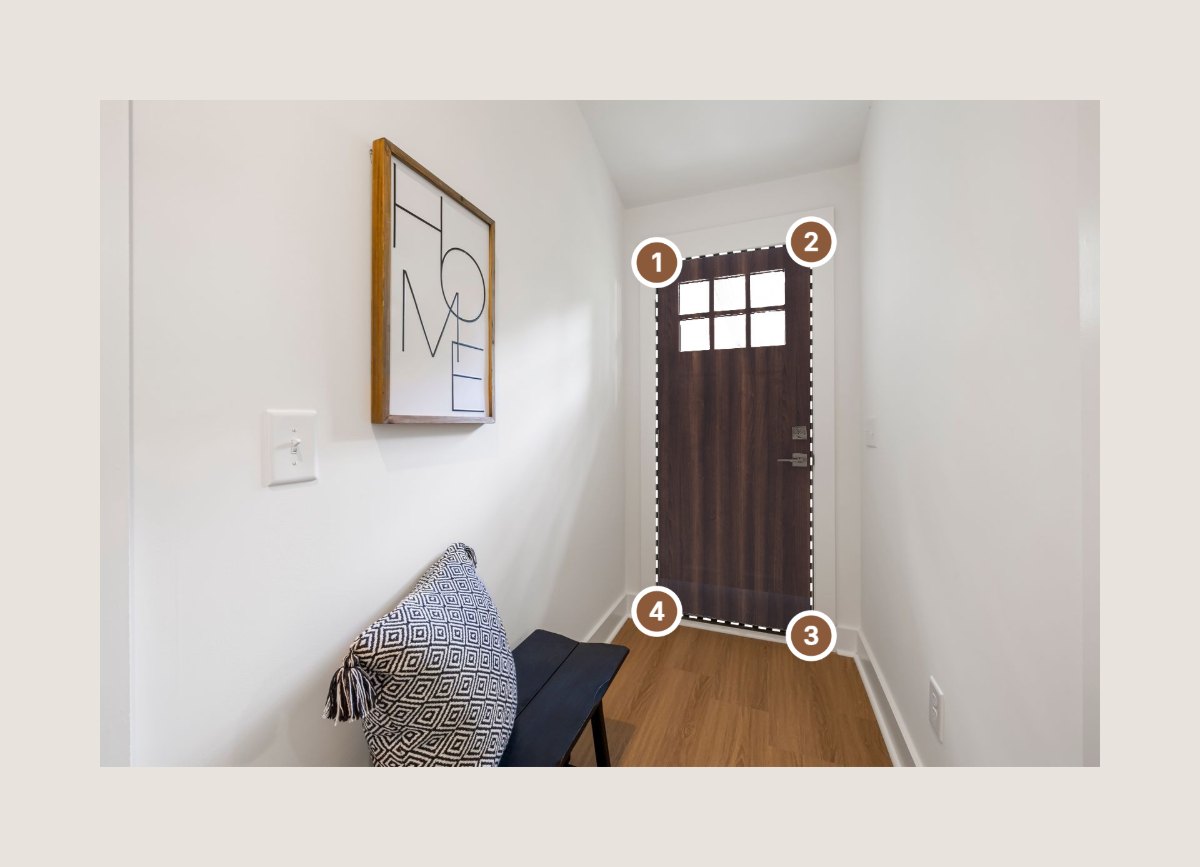
03Adjust the corners
Tap a marked surface to display its corner points, then drag each point onto the true corner. On a phone, pinch with two fingers to enlarge the photo and move it with two fingers for a precise position. Each surface can be adjusted at any time.
 04
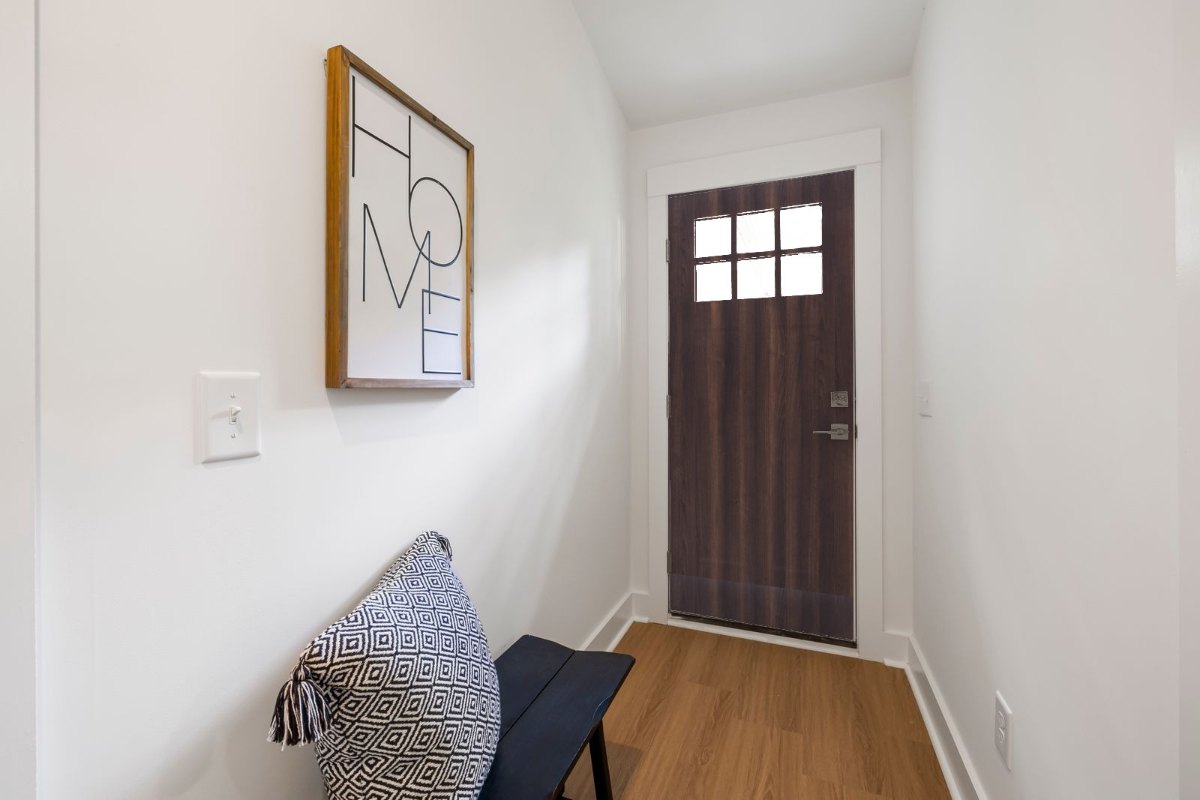
04Choose the material and colour
Select the material for the surface (HPL, phenolic, WPC, flexible tile or toilet cubicle colours), then choose a colour. Set the pattern direction and enter the actual width and height in millimetres so that boards and tiles are shown at their true size.
 05
05Keep objects in front of the surface
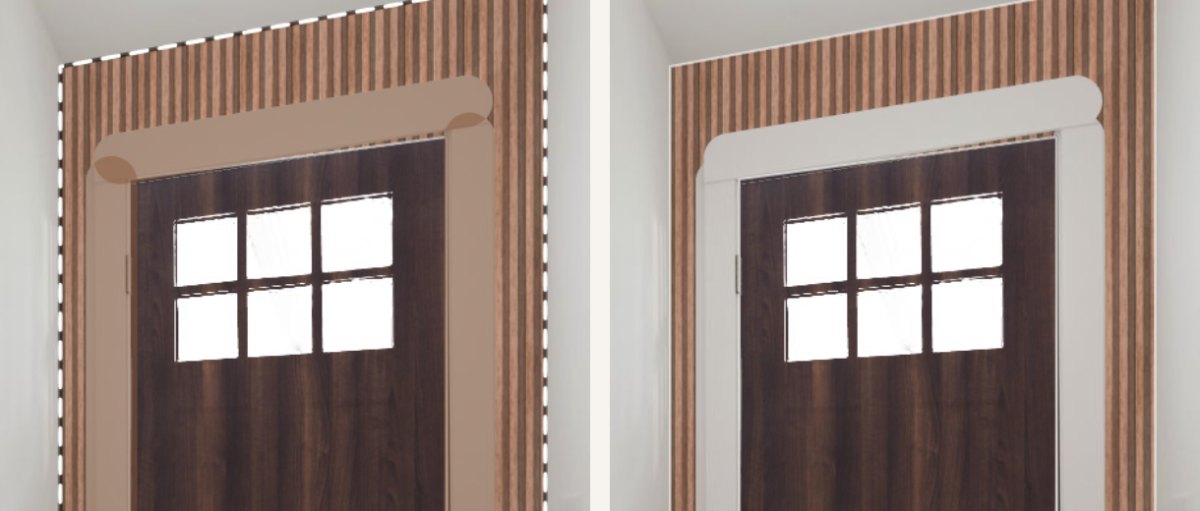
Objects that differ clearly from the surface, such as furniture, screens and cables, are kept automatically. For an object of a similar colour, such as a door frame painted in the same colour as the wall, select “Keep brush”, paint over it and select “Done”. “Undo” removes the last stroke.
 06
06Add further surfaces, save and send
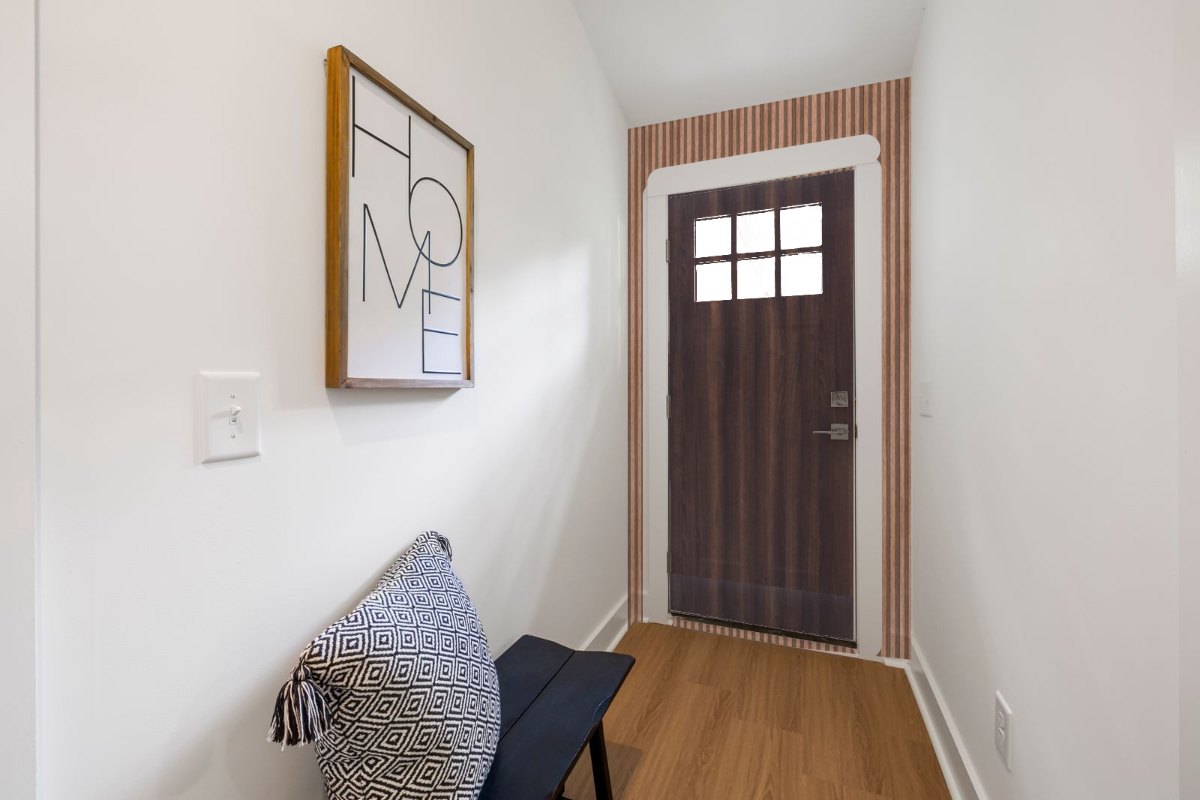
Repeat the steps for every surface you wish to change. Select “Save image” to keep the result, and “WhatsApp this design” to send us the list of materials and colours; please attach the saved image in the chat.
Room photo: Pexels
For the best result
- Photograph the surface straight on, in landscape orientation and in good, even light.
- Keep the camera level; avoid wide-angle or panoramic modes, which bend straight lines.
- Clear the space in front of the surface where possible.
- Measure the surface and enter its actual width and height.
Please note
- Flat surfaces give the best results: walls, doors, cabinet fronts, partitions and counter fronts.
- Curved walls and columns cannot be represented accurately from a single photo.
- Your photo is processed on your own device and is not uploaded to our website.
- The preview is for illustration only. Colours on screen may differ from the actual product; please request a physical sample.
Customize Design
Select a room, specify a surface, and apply your preferred color to instantly visualize the space. Once you have finalized your design, kindly forward the combination to our team via WhatsApp for a personalized consultation.
Start now